
Knowing how to pack dishes the right way can save you from opening a box at your new home and hearing that sad rattle of broken pieces. Kitchens are usually the hardest room to pack, and dishes are a big reason why. They are heavy, fragile, and come in every shape you can imagine.
The good news is that a few simple habits make a huge difference. With sturdy boxes, plenty of packing paper, and a steady routine, you can protect everyday plates and the serving bowl your grandmother passed down. Below you will find a clear, step-by-step method you can follow whether you are moving across Tyler or across East Texas.
Would you rather hand the kitchen to a careful crew? ETX Moving can pack it for you.
Before you wrap a single plate, set yourself up with the right materials. Running out of paper halfway through a cabinet is how people start cutting corners, and cutting corners is how dishes break.
ETX Moving helps households in Tyler and nearby communities like Flint and Lindale with local moving and careful packing of fragile items.
Dish pack boxes, sometimes called double wall boxes, are thicker than standard moving boxes. That extra layer of cardboard helps the box hold its shape under weight and absorb bumps during the drive. If you cannot find dish packs, pick small or medium boxes in good condition. Skip worn grocery store boxes with soft corners or old tape. A box that sags when empty will not hold up full of stoneware.
Keep box size in mind. Dishes get heavy fast, and a large box filled with plates can be too heavy to lift safely or may split at the bottom. Smaller boxes keep the weight manageable for you and for anyone helping you carry.
Plain packing paper is your best friend. It is clean, soft, and easy to crumple into padding. Newspaper works in a pinch, but the ink can rub off onto your dishes, which means extra washing later. Here is a simple supply list:
If you are packing yourself, ETX Moving can supply boxes and materials upon request before moving day, so ask when you schedule.
Clear a section of countertop or set up a sturdy table. Lay down a stack of paper, keep your tape within reach, and build one box at a time. Working from a single spot keeps the process calm and helps you stay consistent from the first plate to the last.
A good box is only as safe as its foundation. Taking a few extra minutes here protects everything you put inside.
Fold the bottom flaps closed and run tape along the center seam. Then add strips across the seam and along the edges. Many people use an H pattern so every edge is sealed. Press the tape down firmly so it bonds well with the cardboard.
Crumple several sheets of packing paper into loose balls and spread them across the bottom of the box. Aim for a soft layer a few inches deep. You can also lay a folded towel on top of the paper. This cushion absorbs shock if the box gets set down hard or bounces in the truck.
Think of the box as having three zones: heavy items on the bottom, medium items in the middle, and the lightest, most delicate items on top. Following that order keeps heavy plates from crushing thin glassware.
If the kitchen feels like too much, our partial packing service lets you pick only the rooms or fragile items you want handled.
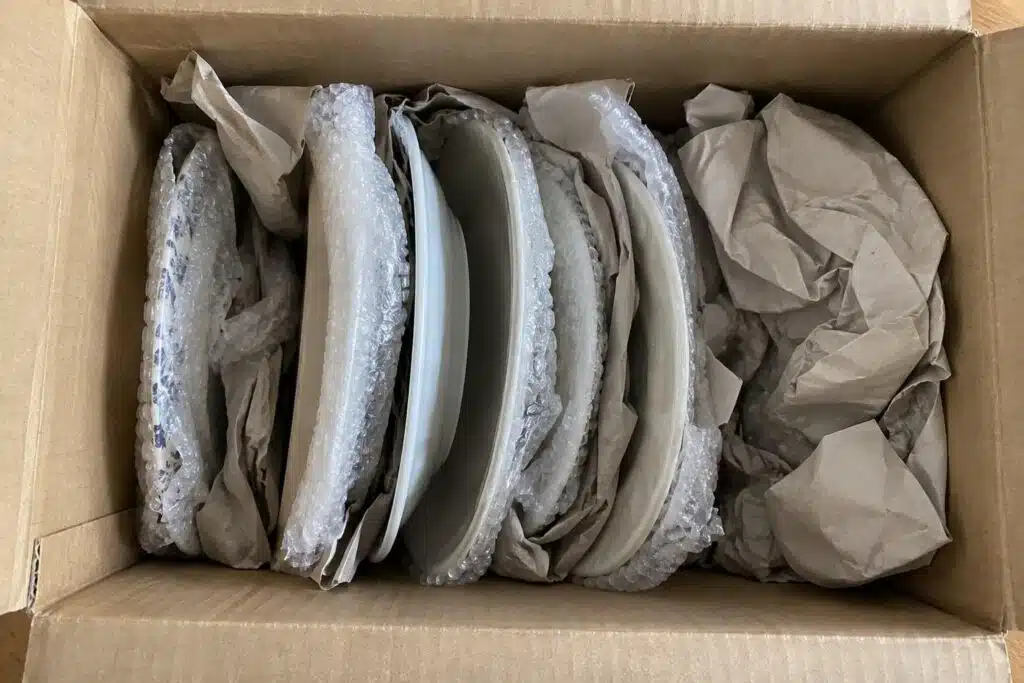
Each kind of dish needs a slightly different approach. Once you learn the pattern for plates, bowls, and glasses, the rest of the kitchen goes faster.
Place one plate in the center of a stack of paper. Pull a corner of the paper over the plate, then the next corner, and keep folding until the plate is fully covered. For extra protection, wrap a small bundle of two or three plates together after each is wrapped on its own.
Now the key step: stand the plates on edge in the box, like records in a crate. Plates are stronger along their edges than across their flat faces, so standing them up helps them handle pressure and bumps better than a flat stack. Line them up snugly in a row along the bottom layer.
Wrap each bowl separately. Once wrapped, you can nest two or three bowls of the same size together and wrap the group in another sheet. Set bowls in the box upright or on their sides, depending on what fits snugly, and add crumpled paper around them.
Glasses are where cell dividers really earn their place. Stuff the inside of each glass with a little crumpled paper, then wrap the outside. For stemware, give the stem extra attention by wrapping it first with a few layers of paper or a small piece of bubble wrap, since the stem is usually the weakest point. Slide each wrapped glass into its own cell, base down so it stands upright, and fill extra space in the cell with paper.
Mug handles snap easily. Wrap a bit of paper around the handle first, then wrap the whole mug. Nest mugs only if they fit loosely and are well wrapped. Place them near the top of a box or in their own small box.
Platters, gravy boats, casserole dishes, and heirloom pieces deserve extra care. Wrap them in a layer of bubble wrap, then a layer of paper. Large platters can stand on edge just like plates. Lids should be wrapped separately from their dishes and packed right next to them so they do not get lost. Pieces with sentimental value may travel best in a small box of their own.
Keep this table handy while you work. It sums up how to pack dishes by type so you do not have to guess at the counter.
| Item | How to Wrap | Box Placement |
|---|---|---|
| Dinner plates | Wrap each plate in paper, then bundle two or three together | Bottom layer, standing on edge |
| Salad and dessert plates | Wrap individually, bundle small sets | Bottom or middle layer, on edge |
| Bowls | Wrap each, then nest same size bowls and wrap again | Middle layer, upright or on side |
| Drinking glasses | Stuff inside with paper, wrap outside | Top layer, one per cell divider |
| Stemware | Wrap stem first, then the bowl and base | Top layer, one per cell divider |
| Mugs | Wrap handle first, then the full mug | Top layer or separate small box |
| Platters and serving dishes | Bubble wrap plus a paper layer | On edge along the side of the box |
| Lids | Wrap separately from the dish | Next to the matching dish |
Once your dishes are inside, the goal is simple: nothing should move. A box where items can slide is a box where items can break.
Tuck crumpled paper into every gap along the sides and between bundles. Dish towels, pot holders, and soft linens work well too and save you from packing them elsewhere. When you finish a layer, add a few sheets of paper flat on top before starting the next layer.
Before closing the box, gently rock it from side to side. If you hear clinking or feel anything shift, open it back up and add more padding. Top off the box with one more cushion layer so the lid presses down lightly on soft paper rather than on dishes.
Seal the top with tape. Then write FRAGILE and THIS SIDE UP on at least two sides and on the top, along with arrows pointing up. Add the room name, like Kitchen, and a short note about what is inside, such as Everyday Plates or Wine Glasses. Clear labels help anyone carrying the box handle it the right way and make unpacking far easier.
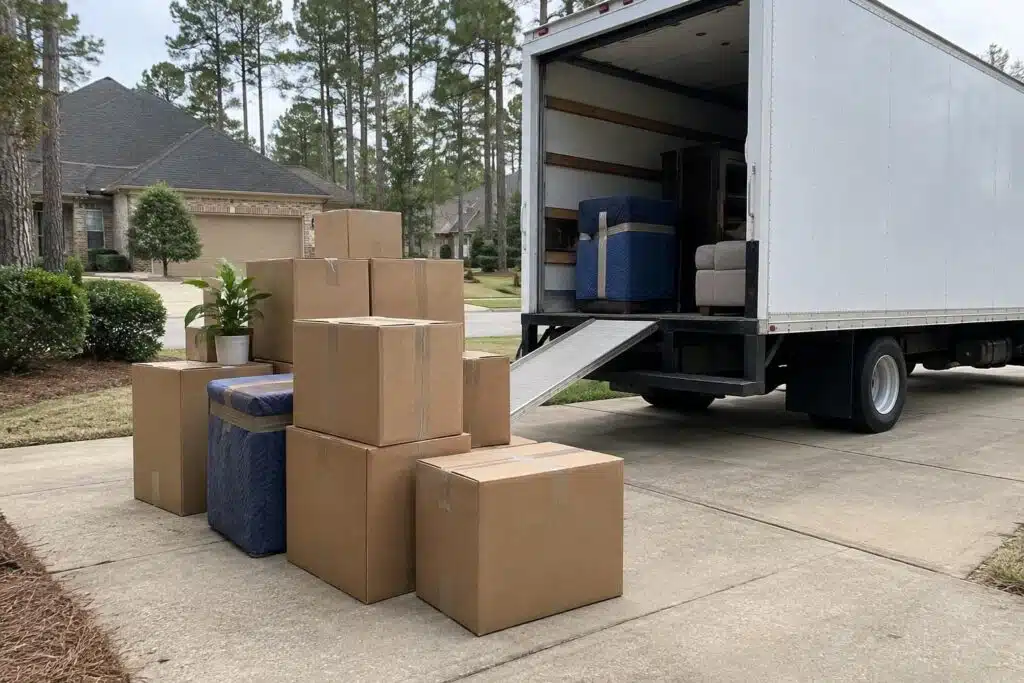
Careful packing can be undone in a few seconds of rough handling. How the boxes ride matters just as much as how they were packed.
Lift dish boxes with both hands under the bottom, never by the flaps. In the truck or car, place dish boxes on the floor or on top of sturdy, heavy boxes, never underneath them. Keep them upright, following the arrows you drew.
Tyler summers can be hot and humid, and a sudden rain shower is never far off. Cardboard that sits out in humid air or gets wet can soften, which weakens the box. Try to keep dish boxes inside until they are ready to load, and cover them if the sky looks uncertain. Our moving day overview walks through how the crew handles loading and delivery.
Pack a small box with a couple of plates, bowls, cups, and utensils for each person in your home. Label it Open First and ride with it in your own vehicle. That way you are not digging through every kitchen box just to eat dinner on your first night.
Unpacking deserves the same patience as packing. A lot of small pieces get thrown out with the paper by accident.
Cut the tape carefully with a shallow blade so you do not scratch anything inside. Work from the top layer down, since the lightest and most fragile items are usually up there.
Unwrap each bundle over the open box or a clear counter. Shake out each sheet of paper before you throw it away. Small lids, saucers, and handles have a way of hiding in the folds.
Give everything a quick wash before putting it away, especially if you used newspaper or the boxes sat in storage. Then set up your cabinets in a way that works for your new kitchen. If you would rather skip this step altogether, the ETX Moving unpacking service includes unwrapping, placing items where you want them, and removing packing debris. The crew can even unpack into cabinets and drawers if you would like.
Prefer to have every room handled from start to finish? Our full packing service covers every room and every item, from dishes and clothes to furniture and decor.
ETX Moving is a family-owned moving company based in Tyler, Texas, serving families and businesses across East Texas. The team offers local and long-distance moving, residential and commercial moves, full and partial packing, unpacking, and limited furniture assembly. ETX Moving is licensed and insured, with USDOT 4187188 and TxDMV No. 009889002C. Call or Text (903) 714-3873 to talk through your move.
Wrap each plate on its own in packing paper, then bundle two or three wrapped plates together. Stand them on edge in a sturdy, padded box rather than stacking them flat. Fill gaps with crumpled paper so nothing slides, and add a cushion layer on top before you seal the box and label it FRAGILE.
Yes, towels and soft linens work well as extra padding and gap fillers. They are great for the bottom cushion layer and for filling space between bundles. Still, wrap each dish in paper first, because fabric alone can shift and leave edges exposed. Using both gives you good protection while packing some linens at the same time.
Newspaper can work, but it is not ideal. The ink can rub off onto dishes, so you will likely need to wash everything after the move. Plain packing paper is cleaner and softer. If you do use newspaper, consider a layer of plain paper directly against the dish and newspaper only for padding.
A box of dishes should be light enough for you to lift comfortably and carry without strain. That is why smaller boxes work best for kitchen items. If a box feels too heavy or the bottom flexes when you lift it, move some dishes into another box. Lighter boxes are safer for your back and your plates.
Yes. ETX Moving offers full packing, which covers every room and item, including dishes. With partial packing, you choose exactly what the crew handles, whether that is just the kitchen or a few fragile pieces. If you pack yourself, ETX Moving can supply boxes and materials upon request before moving day.
Use a box with cardboard cell dividers so each glass sits in its own compartment. Stuff the bowl of each glass with crumpled paper, wrap the stem with extra paper or bubble wrap, then wrap the whole glass. Place glasses on the top layer of the box and fill any space inside the cells with paper.
Packing dishes safely takes sturdy boxes, plenty of paper and a little patience. Wrap each piece on its own, stand plates on edge, fill every gap and label boxes clearly, and your kitchen will arrive in Tyler ready to use.
Whether you pack the kitchen yourself or want a careful crew to handle it, ETX Moving is here to help your move go smoothly across Tyler and East Texas. Call or Text (903) 714-3873 or contact our team to request your free estimate. ETX Moving is located at 3800 Paluxy Dr Ste. 130, Tyler, TX 75703.
Good packing tips for moving can turn a stressful week into a calm, organized one. The way…
A good moving checklist turns one giant, stressful job into a series of small tasks you can…
If you are wondering how much to tip movers, you are not alone. Tipping a moving crew…

Contact ETX Moving today and let our faith-driven, family-owned team serve you with care and integrity.